Connect
The Connect section enables you to connect apps and view and configure your payment extension connection settings.
Find your credentials
For the following payment extensions, you can find your sandbox and live credentials in the Peach Payments Dashboard:
- Ecwid
- Magento
- Shopify
- Wix
- WooCommerce
- Xero
Payment extension sections only appear in the Connect section if you or Peach Payments have configured them for your account. If you don't see a payment extension section, or for other payment extensions, contact support to configure it for your account, or for further assistance.
To test integrations and payment methods, you need sandbox credentials. To accept live payments, you need live credentials.
The following video showcases how to find your live credentials on the Peach Payments Dashboard:
Follow these steps to find your credentials:
-
Log in to your Peach Payments Dashboard.
-
In the Connect section, click your payment extension, for example, WooCommerce.
-
Depending on your payment extension and the services that you've linked to your Peach Payments account, the API keys section enables you to copy your credentials:
- Shopify: Entity ID and secret token
- Wix: Entity ID
- WooCommerce: Entity ID, secret token, access token, client ID, client secret, merchant ID, and recurring ID
- Magento: Entity ID, secret token, access token, client ID, client secret, merchant ID, and recurring ID
- Ecwid: Entity ID and secret token
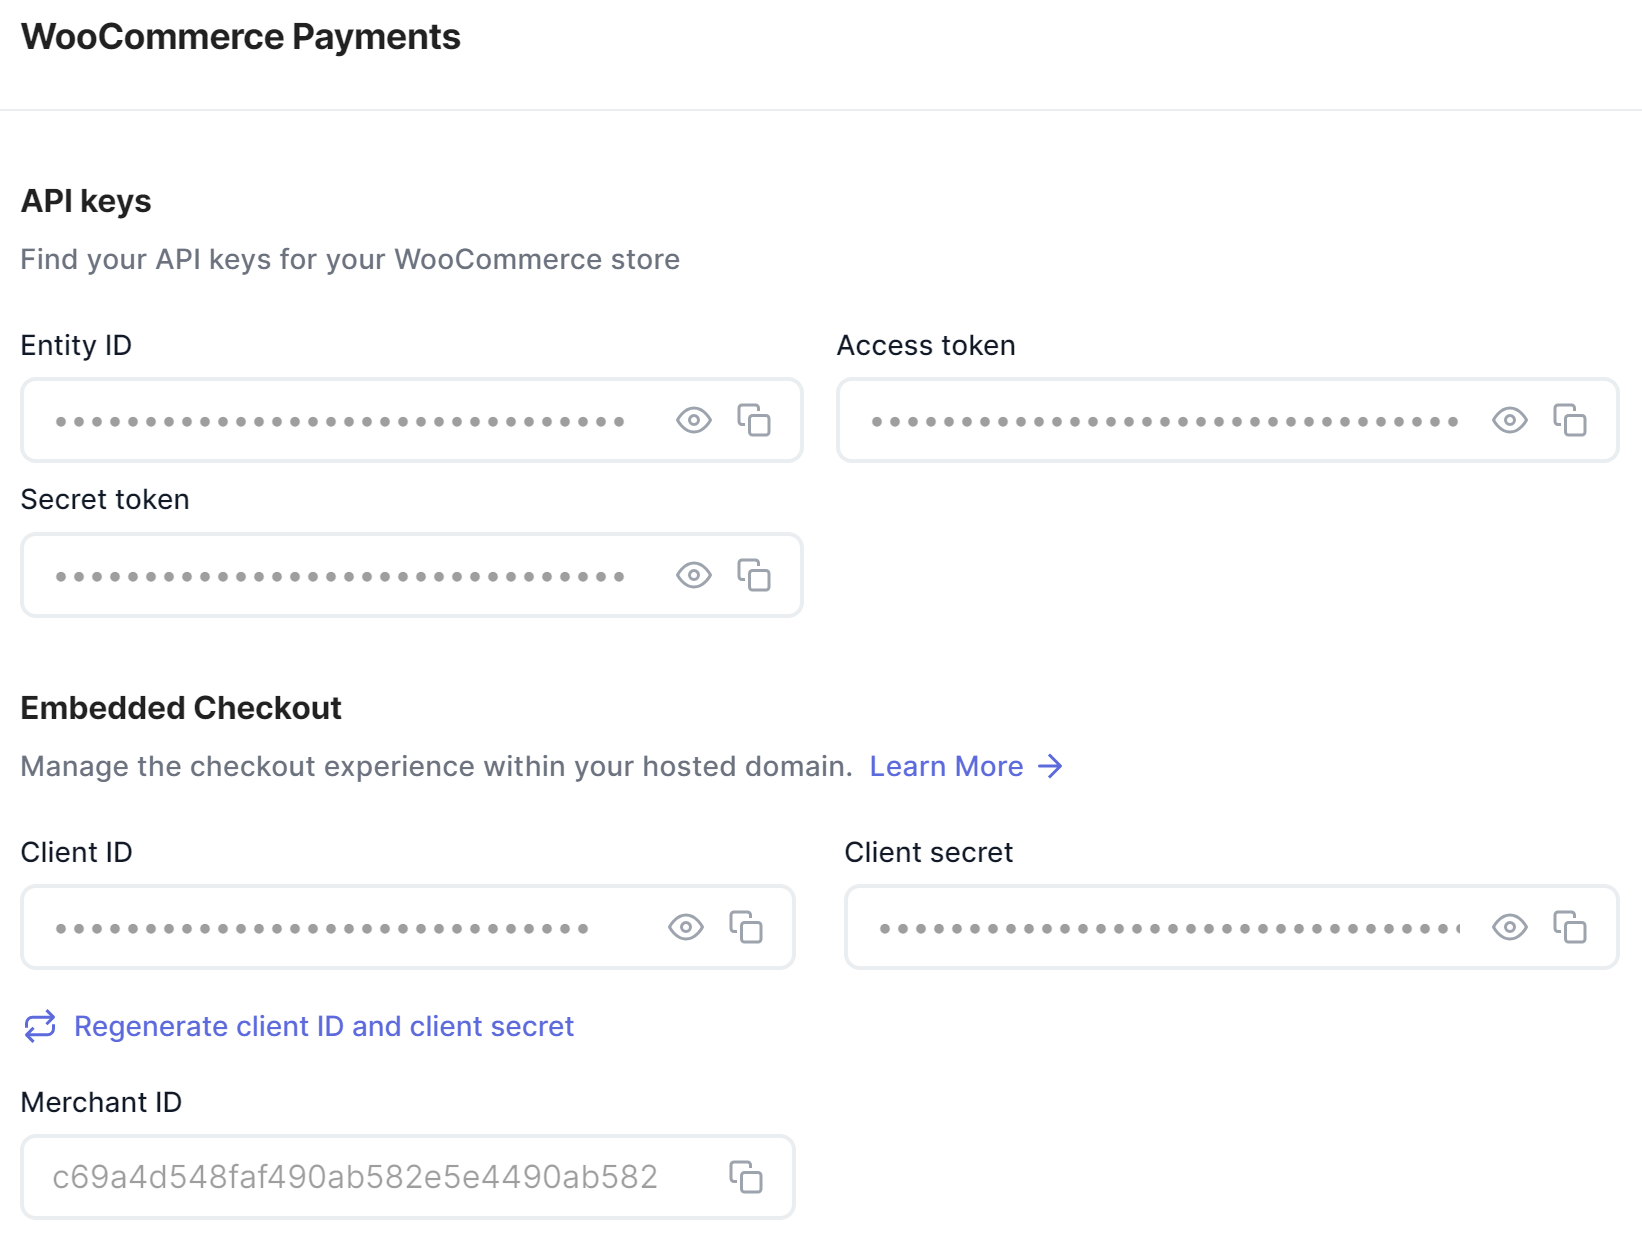
API keys for payment extensions, for example, WooCommerce.
To retrieve your sandbox credentials, switch to the sandbox Dashboard and follow the instructions above.
If you can't find your credentials, contact support.
Configure a webhook
To configure a webhook, follow the instructions in the webhook documentation.
Allowlist domains
Add a domain to the allowlist
For the Magento and WooCommerce payment extensions, you must add your domain to the Peach Payments allowlist to accept payments:
-
Log in to your Peach Payments Dashboard.
-
In the Connect section, click Magento or WooCommerce.
-
Scroll down to the Allowlisted domains section and click Add domain.
-
Enter the domain, subdomain, or IP that you want to add to the allowlist, then click Add.
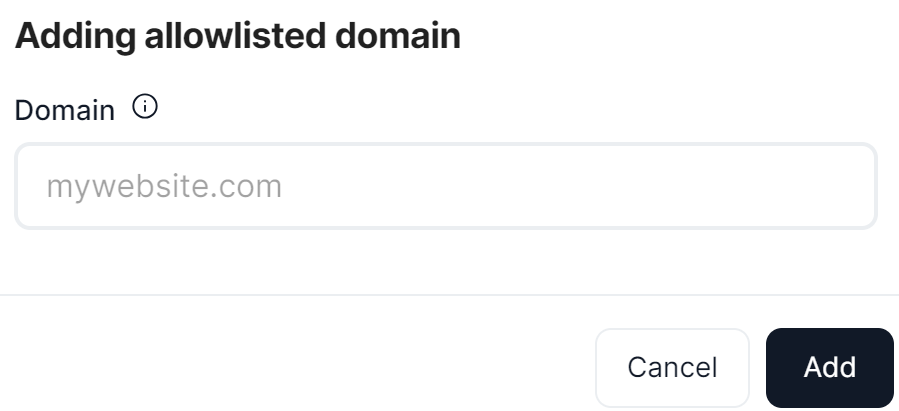
Add a domain to the allowlist.
-
If the domain that you added:
- Matches the one that Peach Payments has on record for you, the domain appears in the allowlisted domains list.
- Doesn't match the one that Peach Payments has on record for you (or if Peach Payments doesn't have a domain on record), the domain enters a pending state until Peach Payments has verified the domain, whereafter the domain appears in the allowlisted domains list. If the domain fails the Peach Payments risk checks, it enters a declined state for 14 days, whereafter Peach Payments removes it from the domain list.
Adding a domain on sandbox does not need verification.
Delete a domain from the allowlist
You cannot delete pending or declined domains.
To delete a domain from the allowlist:
- Log in to your Peach Payments Dashboard.
- In the Connect section, click your payment extension, for example, WooCommerce.
- Scroll down to the Allowlisted domains section and click the more options icon next to the domain that you want to delete.
- Click Delete.
The domain disappears from the allowlisted domains section.