View and refund transactions
The Transactions section of the Dashboard enables you to view transaction information and perform a range of tasks.
View transactions for multiple businesses
If you've got access to multiple businesses in the same organisation, you can view transactions for multiple businesses without having to switch between businesses:
-
In the top menu, click Businesses.
-
In the Business filter window that appears, search for and select the businesses whose transactions you want to view. To view the transactions for all businesses that you have access to, select the All businesses check box.
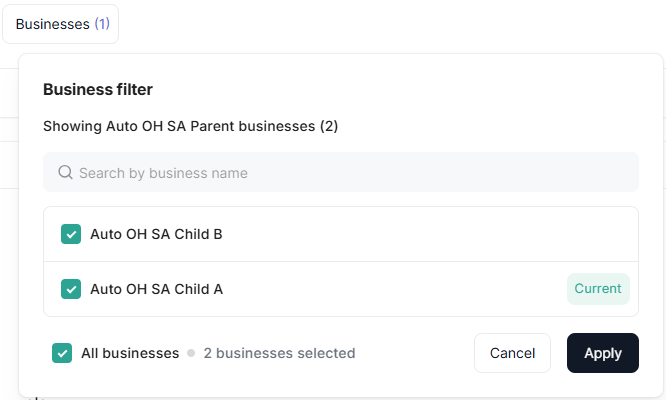
The business filter enables you to select the businesses whose transactions you want to view.
-
Click Apply.
The Dashboard updates to show transactions for all the selected businesses. The transaction listing now includes a Business column showing which business the transaction occurred under. If you export the list of transactions, the export includes the merchant name and merchant ID so that you can differentiate between businesses.
Search and filter transactions
Perform a basic search as follows:
- In the left navigation menu, click Transactions.
- For the most accurate search results, enter the full transaction ID, merchant order ID, customer name, reference, request ID, or similar into the search bar.
The search results appear.
You can search for other fields using the Advanced search button.
Advanced search
The Dashboard enables you to search for specific fields, including, amount, merchant order ID, transaction ID, invoice ID, short ID, channel ID, card number, IP address, result code, shopper ID, customer email, and customer name.
Peach Payments uses channel ID and entity ID interchangeably. Finding the channel or entity ID differs slightly for connections, Payment Links, Checkout, and Payments API.
-
In the Transactions section, click Advanced search.

The Advanced search button is next to the search field.
-
In the Advanced search window that appears, select the field that you want to search by, for example Invoice ID. Then select the appropriate option from the list, for example, Exact value. Lastly, enter the value that you want to search for, for example 2d5b4961db394e6z, to filter for transactions with this invoice ID.
- For some fields, you can enter or paste up to 100 values, separating them with spaces or line breaks. For example, you could copy multiple transaction IDs from a spreadsheet or list and paste them directly into the field.
- You can add multiple filters.
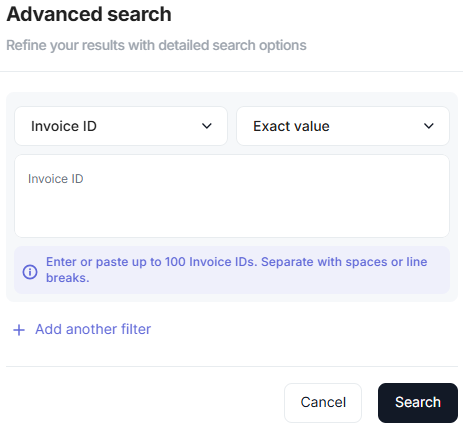
The Dashboard enables you to search for specific fields.
-
Click Search.
The search results appear.
Filter transactions
The Dashboard supports filtering by multiple fields, including transaction status and type, payment brand, currency, and much more:
-
In the left navigation menu, click Transactions.
-
Click Today and select a predefined range, for example, Last 30 days - to specify a custom range and a specific time to search from and to, select Custom range. Alternatively, click the first date field and select the date and time from which you want to filter, then select the date and time to which you want to filter, then click Apply.
-
Click Filters to expand the filter section.
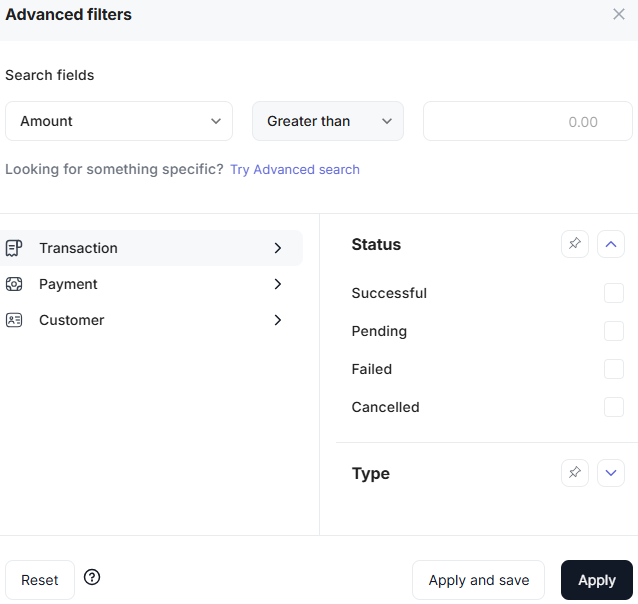
Some available filtering options.
-
Select the Transaction category:
- Expand the Status section and select the statuses that you want to filter for, for example, Successful and Pending.
- Expand the Type section and select the payment types that you want to filter for, for example, Debit (DB).
-
Select the Payment category:
- Expand the Brand section and select the payment brands that you want to filter for, for example, Visa.
- Expand the Products and connections section and select the products or connections that you want to filter for, for example, Checkout.
- Expand the Currency section and select the currency that you want to filter for, for example, ZAR (South African Rand).
- Expand the Clearing institute section and select the clearing institute that you want to filter for, for example, Absa Hiso Aggregation.
-
Select the Customer category, expand the Country section, and select the countries that you want to filter for, for example, South Africa and Kenya.
-
Click Apply to apply the filters or Save and apply to save the filters and apply them. Saving the filters ensures that if you go to another page or log out of the Dashboard, that the Dashboard retains your filters when you return to the Transactions page.
This applies the filters that you selected.
Click the Clear button to remove all the filters. You can also click the Reset button in the Advanced filters panel to reset the filters.

Filter bar with Clear button.
You can also pin specific filter sections that you use often:
-
In the Advanced filters panel, select the filter category that contains the filter section that you want to pin, for example, Transaction.
-
Click the pin icon for the section that you want to pin, for example, Status.

Pin filter sections that you use often.
-
You can pin filter sections from multiple categories. For example, select the Payment filter category and click the pin icon for another category section, like Brand.
A new Pinned filters category appears with the pinned filter sections available.
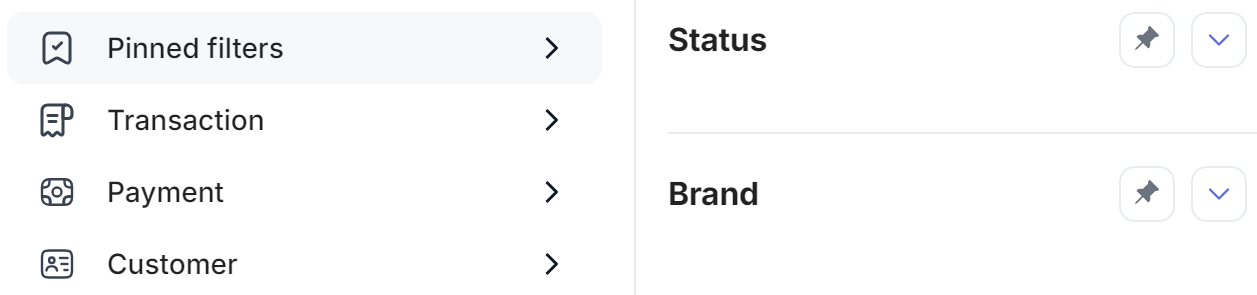
Pinned filters category.
Find linked transactions
To find linked transactions, select a transaction and then, in the details panel that appears, scroll down to the Linked transactions section. A chronological view of all linked transactions appears.
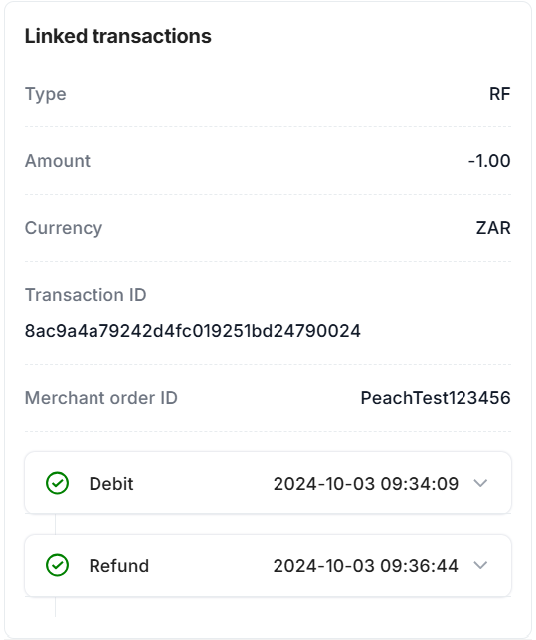
Linked transactions section.
Linked transactions include, but are not limited to:
- A debit linked to a refund or reversal.
- A preauthorisation or registration linked to recurring transactions.
- A preauthorisation linked to a capture.
Understand response codes
See the Response codes section for more information on why certain response codes occur.
Find a transaction's ECI flag
- The Electronic Commerce Indicator (ECI) is a value provided by Directory Servers (such as Visa, Mastercard, and American Express) that reflects the result of authentication attempts on transactions processed through 3-D Secure.
- The ECI flag indicates whether the transaction was fully authenticated via 3-D Secure or if there was only an authentication attempt.
To find the ECI flag value of a card transaction, select the transaction and then in the details panel that appears, click More details and scroll down to the Processing info section.
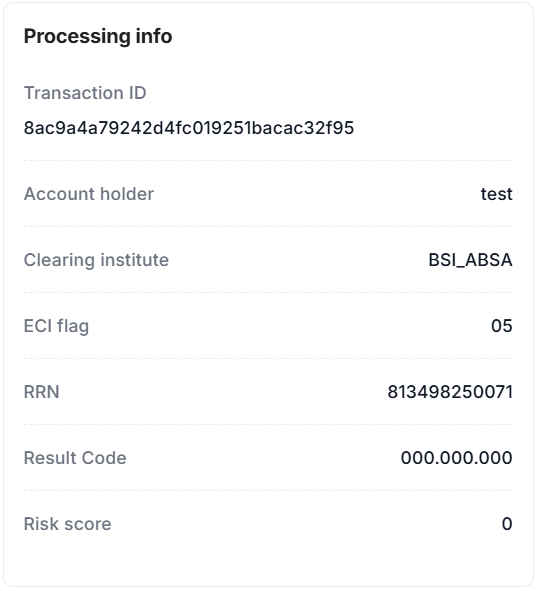
Processing info section.
ECI values show the result of 3-D Secure authentication across card networks.
| Card brand | ECI value | 3-D Secure status | Description |
|---|---|---|---|
| Mastercard | 00 | Authentication failed | The customer's card or bank lack 3-D Secure support, or technical or configuration errors occurred. |
| 01 | Authentication attempted, incomplete | The customer's card or bank lack 3-D Secure support, or the cardholder ran out of time during authentication. | |
| 02 | Authentication successful | The customer's card and bank are secured by 3-D Secure. | |
| Visa and American Express | 05 | Authentication successful | The transaction is fully secured by 3-D Secure. |
| 06 | Authentication attempted, incomplete | The customer's card or bank are not enrolled for 3-D Secure. | |
| 07 | Authentication failed | The customer's card or bank lack 3-D Secure support, or technical or configuration errors occurred. |
Find a transaction's Merchant Advice Code
- A Merchant Advice Code (MAC) is a response code from a card issuer or payment network (for example, Visa, Mastercard, and so on). It informs a merchant how to handle a failed transaction based on the issuer's assessment.
- A MAC helps optimise transaction workflows, reduce unnecessary retries, and ensure compliance with payment network rules. It provides guidance, such as whether to retry the transaction, request extra authentication, or decline it permanently.
To find the MAC value of a card transaction, select the transaction and then in the details panel that appears, click Logs and in the drop-down list, click Connector.
- Only certain roles can view the Logs > Connector section.
- Not all card transactions feature the Merchant Advice Code.
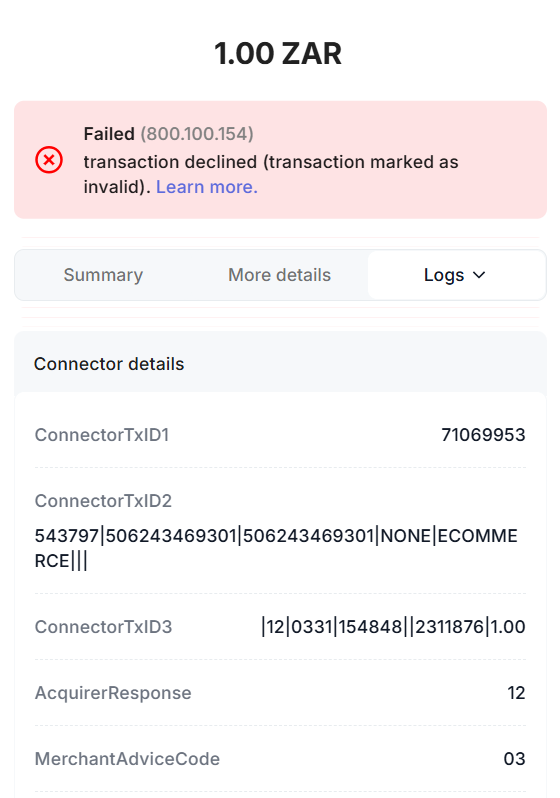
Connector details section.
Importance of MACs
- Compliance:
- Keeps merchants in card network guidelines and prevents penalties. For example, Mastercard applies a Merchant Violation Fee when merchants exceed retry limits.
- Improper handling can increase chargebacks which impacts merchant and PSP operations and in certain cases, can result in suspension from card networks.
- Fraud mitigation: MACs help identify fraud so merchants can act, for example, to block transactions or BINs.
- Operational efficiency: MACs give specific instructions that reduce failed transaction attempts and cut costs.
- Customer experience: Following MAC guidance prevents repeated declines and transaction delays that frustrate customers.
- Minimising risk of fines: Payment networks like Visa and Mastercard penalise merchants for improper retry attempts, non-compliance with MAC actions, and failure to prevent fraudulent activity.
Mastercard Merchant Advice Codes
| MAC | Description |
|---|---|
| 01 | New account information is available. Retry after updating details. |
| 02 | Cannot approve now. Retry later. |
| 03 | Do not try again. Retry is not allowed. |
| 04 | Token requirements are not fulfilled for this token type. Retry is not allowed. |
| 05 | Negotiated value is not approved. Retry is not allowed. |
| 21 | Payment has been cancelled and cannot be retried. |
| 22 | Merchant does not qualify for the product code. Retry is not allowed. |
| 24 | Retry after 1 hour. |
| 25 | Retry after 24 hours. |
| 26 | Retry after 2 days. |
| 27 | Retry after 4 days. |
| 28 | Retry after 6 days. |
| 29 | Retry after 8 days. |
| 30 | Retry after 10 days. |
| 40 | Consumer non-reloadable prepaid card. Retry is not allowed. |
| 41 | Consumer single-use virtual card number. Retry is not allowed. |
| 42 | Sanctions Scoring Service score exceeds the applicable threshold value. Retry is not allowed. |
| 43 | Consumer multi-use virtual card number. Retry is not allowed. |
Visa Merchant Advice Codes
| Category | MAC | Description | Recommended action |
|---|---|---|---|
| Approval | 00 | Approval and completed successfully. | |
| 10 | Partial approval. | Ask for alternate payment method. | |
| Accepted | 85 | No reason to decline a request for address verification, CVV2 verification, or credit voucher or merchandise return. | Ask for alternate payment method. |
| Do not reattempt | 04 | Pick up card (no fraud). | Ask for alternate payment method. |
| 07 | Pick up card, special condition (fraud account). | Do not reattempt. | |
| 12 | Invalid transaction. Potential fraud is suspected or issues with merchant terminal. | Review field 44.5—CVV/iCVV results code and field 44.8—card authentication results code for possible failure conditions. | |
| 14 | Invalid account number (no such number). | Revalidate account number for accuracy. Assess for potential fraud. | |
| 15 | No such issuer (first 8 digits of account number do not relate to an issuing identifier). | Revalidate account number for accuracy. Assess for potential fraud. | |
| 41 | Lost card, pick up card (fraud account). | Do not reattempt. | |
| 43 | Stolen card, pick up (fraud account). | Do not reattempt. | |
| 46 | Closed account. | Request alternate payment method from customer and/or advise the cardholder to contact their issuer. | |
| 57 | Transaction not permitted to cardholder. | Request alternate payment method from customer and/or advise the cardholder to contact their issuer. | |
| R0 | Stop this payment. | Contact customer regarding cancellation of all transaction from this merchant. | |
| R1 | Stop all future payments. | Contact customer regarding cancellation of all transaction from this merchant. | |
| R3 | Stop all merchants. | Contact customer regarding cancellation of all transaction from this merchant. | |
| Limit reattempts to 15 in 30 days | 03 | Invalid merchant. The merchant is invalid or does not exist in the network. | Merchants and acquirers must not alter the merchant category code or other transaction data to gain approval. |
| 19 | Re-enter transaction. | If a merchant receives a high volume of RC19, contact acquirer to evaluate possible format errors. For automated fuel dispenser, direct the cardholder to pay inside. Review the field 44.2—address verification result code for possible failure. | |
| 39 | No credit account. | May reattempt by selecting correct account type. | |
| 51 | Not sufficient funds. | May reattempt for a lesser amount or later to allow the customer to fund their debit account or pay down their credit account. | |
| 52 | No checking account. | May reattempt by selecting correct account type. | |
| 53 | No savings account. | May reattempt by selecting correct account type. | |
| 59 | Suspected fraud. | Advise the cardholder to contact their issuer and do not reattempt the transaction until the cardholder confirms. | |
| 61 | Exceeds withdrawal amount limit. | Do not reattempt the transaction the same day to allow limits to reset. | |
| 62 | Restricted card (card invalid in region or country). | Merchant may reattempt if the cardholder confirms the restriction has been removed. Merchants and acquirers must not alter country code or other transaction data to gain approval. | |
| 65 | Exceeds withdrawal frequency limit. | Do not reattempt the transaction the same day to allow limits to reset. Merchant may advise the cardholder to contact their issuer. | |
| 75 | Allowable number of PIN tries exceeded. | Do not reattempt the transaction the same day to allow limits to reset. POS transactions may be reattempted as a non-PIN transaction if applicable. | |
| 78 | Blocked, first used or special condition: New cardholder not activated, or card is temporarily blocked. | Merchant may reattempt if the cardholder confirms the card has been activated or reactivated. | |
| 86 | Cannot verify PIN. | Reattempt can occur in same day. POS transactions may be reattempted as a non-PIN transaction if applicable. | |
| 91 | Issuer unavailable or switch inoperative (STIP not applicable or available for this transaction) or Time-out when no STIP or causes decline at POS. | Reattempt can occur in same day. No more than one attempt per day. | |
| 93 | Transaction cannot be completed. Violation of law. | Do not reattempt. | |
| 96 | System malfunction. | Reattempt can occur in same day. | |
| N3 | Cash service not available. | Reattempt the transaction without the request for cash back. | |
| N4 | Cash request exceeds issuer or approved limit. | Declined transactions can be resubmitted with lower cashback amounts or actual purchase amount only. | |
| Z5 | Valid account but amount not supported. | Do not reattempt with same credential; may retry with different amount. | |
| Revalidate data prior to reattempt, monitor for fraud attacks | 54 | Expired card or expiry date missing. | Validate the expiration date prior to reattempt. Monitor reattempts for potential fraud. |
| 55 | PIN incorrect or missing. | Reattempt with a valid value (re-enter PIN). POS transactions may be reattempted as a non-PIN transaction if applicable. | |
| 70 | PIN data required. | Reattempt with a valid PIN. | |
| 82 | Negative online CAM, dCVV, iCVV, CVV, CAVV, dCVV2, TAVV, or DTVV results. | Review the field 44.5—CVV/iCVV results code and field 44.8—card authentication results code for possible failures and correct prior to reattempt. Monitor reattempts for potential fraud. | |
| 1A | Extra customer authentication required. | For card present, reattempt using chip + PIN. For card-not-present, reattempt transaction using 3-D Secure. | |
| N7 | Decline for CVV2 failure. | Validate the CVV2 value before reattempt. Monitor reattempts for potential fraud. | |
| Minimal use of generic response codes | 01 | Refer to card issuer. | Reattempt allowed in the defined threshold limit and issuer is unlikely to provide an approval, as these are permanent conditions. |
| 02 | Refer to card issuer, special condition. | ||
| 05 | Do not honour. | ||
| 06 | Error. | ||
| 13 | Invalid amount or currency conversion field overflow. | ||
| 58 | Transaction not allowed at terminal. | ||
| 64 | Transaction does not fulfil AML requirement. | ||
| 74 | Different value than that used for PIN encryption errors. | ||
| 79 | Reversed (by switch). | ||
| 80 | No financial impact (used in reversal responses to declined originals). | ||
| 81 | Cryptographic error found in PIN (used for cryptographic error condition found by security module during PIN decryption). | ||
| N0 | Force STIP. Issuers can respond with this, which routes transaction to STIP. Issuers use code when they cannot perform authorisation but want STIP to perform it. | ||
| Z3 | Unable to go online, offline-declined. |
View a summary of transactions
The Transactions summary section provides a summary of your sales (DB and CP transactions), refunds (RF and CD), and the net total for all the transactions for the date range selected. It also lists the number of successful transactions.

Summary of transactions.
Export transactions to CSV
To export a list of all the returned transactions, click the Download a CSV button. If the export takes less than 6 seconds, your device downloads the CSV immediately.
If it takes more than 6 seconds:
- The Dashboard queues the download for processing. It notifies you when it has completed processing the CSV and has made the CSV available for download.
- In the left navigation menu, click Exports. The queue of exports displays, showing their statuses.
- Go to the Downloads tab.
- Find the export that you want to download and click Download on the right. Downloads are available to all users linked to the business for 7 days.
Only certain roles can export transactions.

Download CSV button.
Refund a debit
- Only certain roles can refund transactions.
- You can only refund transactions for certain payment methods from the Dashboard.
The following video showcases how to refund a transaction using the Peach Payments Dashboard:
Refund a transaction as follows:
-
In the left navigation menu, click Transactions.
-
Use the search bar or filters to find the debit (DB), credit (CD), or capture (CP) transaction that you want to refund, then select it. You cannot refund other transaction types.
-
In the details panel that appears, click Refund in the upper left of the panel.
Refund button.
-
In the Refund transaction window that appears:
- Select whether you would like to perform a full or partial refund. If you're performing a partial refund, specify the amount that you would like to refund.
- Select the refund reason, options include a cancelled order, duplicate order, and much more. If you select Other, provide more details in the field that appears.
- Click Issue refund.
-
In the confirmation window that appears, click Confirm.
-
A note appears highlighting the submission of the refund for processing.
- The refund should reflect in the customer's account in 3 to 10 working days.
- A refund older than six months must be manually processed by the Peach Payments team, contact support for assistance.
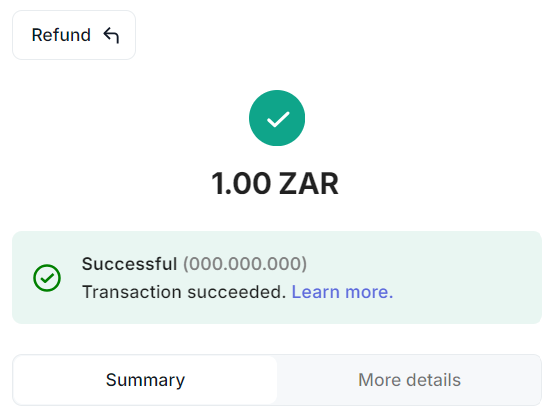
Download proof of refund
The proof of refund becomes available 10 minutes after the processing of the transaction.
Download proof of refund from the Dashboard as follows:
-
In the left navigation menu, click Transactions.
-
Use the search bar or filters (for example, filter for the refund transaction type) to find the refund transaction (not the original payment transaction) and then select it.
-
In the details panel that appears, click the more options icon, then click Proof of refund.
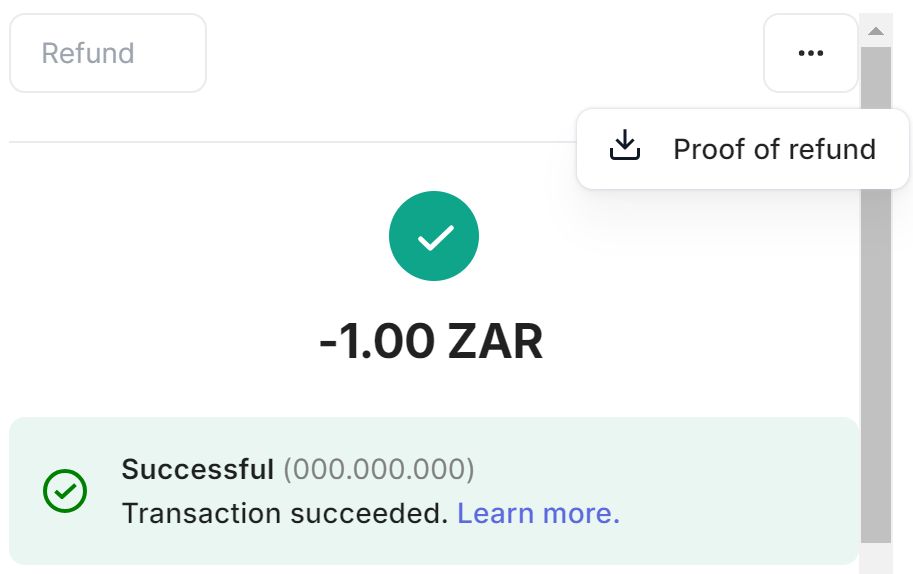
Proof of refund button.
-
The proof of refund PDF downloads.
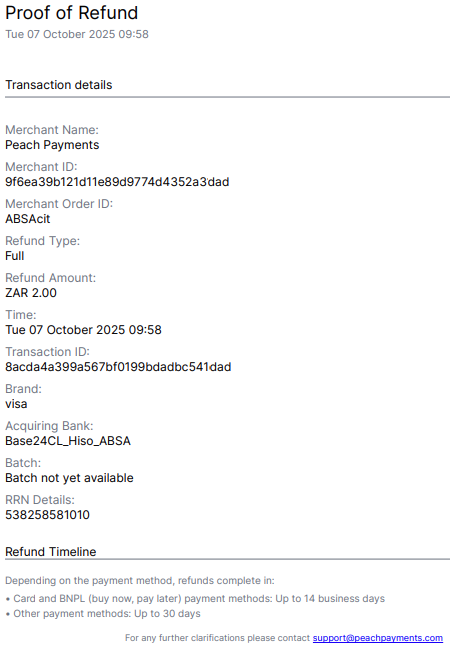
Sample proof of refund.
Capture or reverse a preauthorisation
- Only certain roles can capture and reverse transactions.
- You can only capture or reverse PA transactions.
The Manage card payments section describes how to capture or reverse a preauthorisation (PA) transaction using the Peach Payments Dashboard.
Download proof of 3-D Secure
The proof of 3-D Secure is not available immediately.
Download proof of 3-D Secure for successful debit and preauthorisation transactions from the Dashboard as follows:
-
In the left navigation menu, click Transactions.
-
Use the search bar or filters (for example, filter for successful debit or preauthorisation transactions) to find the transaction and then select it.
-
In the details panel that appears, click the more options icon in the upper right of the screen, then click Proof of 3D.
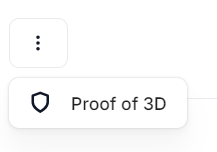
Proof of 3D button.
The proof of 3-D Secure PDF downloads.
Updated about 1 month ago