Ecwid
Connect Peach Payments to your Ecwid store.
Peach Payments offers a plugin for Ecwid which allows you to accept online payments using all the payment methods offered by Checkout.
Overview
| Item | Description |
|---|---|
| Countries | South Africa, Kenya, and Mauritius. |
| Recurring payments | Does not support recurring payments, only once-off payments. |
| Refunds | Does not support full or partial refunds. Use the platform's offline refund feature to log the refund, and then either manually refund your customer or do so using the Peach Payments Dashboard. |
| Currencies | All currencies configured for your account. |
| Pricing | See the Peach Payments website. |
| Account activation | Requires review by Peach Payments South Africa. Contact support for assistance. |
Register account
To connect Peach Payments to your Ecwid store, you must have a Peach Payments account.
Video showcase
The following video showcases the Ecwid integration:
Configure the Ecwid connection in the Peach Payments Dashboard
-
Log in to the Peach Payments Dashboard.
-
In the Connect section in the left-hand menu, click Add connection.
-
In the Ecwid section, click Add connection.
-
Click Add connection.
-
In the Add Ecwid connection window that appears, click Add connection.
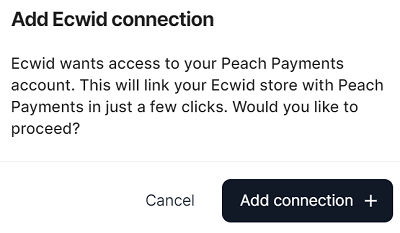
Add Ecwid connection.
-
In the Ecwid section, click Settings and note your entity ID and secret token for later.
To retrieve your sandbox credentials, switch to the sandbox Dashboard and get the credentials from the Ecwid settings section.
You have now configured your Peach Payments account for Ecwid and have access to your Ecwid settings and credentials.
Configure the Peach Payments payment method
You must be on Ecwid's Venture plan or higher to use Peach Payments to accept payments.
-
Log in to your Ecwid control panel and go to the Payment section in the left navigation menu.
-
Scroll down to the Add new payment methods section and click Choose Payment Method > Peach Payments Gateway.
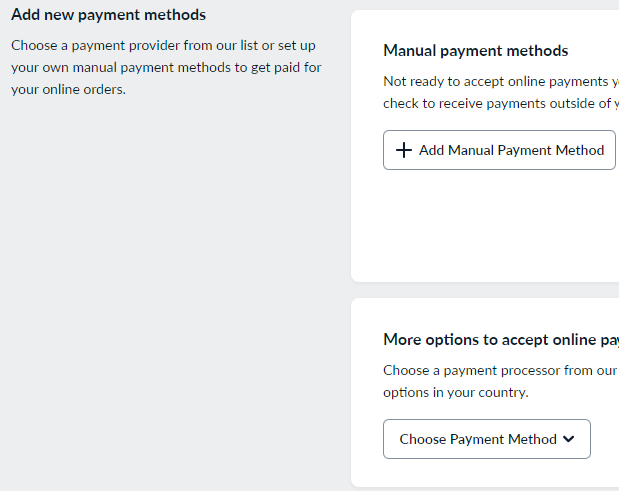
Add new payment methods.
-
In the New payment method: Peach Payments Gateway window that appears, click Add Payment Method.
-
Select whether you want to test on the sandbox environment or accept real payments on the live environment.
-
To test on the sandbox environment, enter your sandbox credentials into the Sandbox entity ID and Sandbox secret token fields. To accept live payments, enter your live entity ID and secret token into the Live entity ID and Live secret token fields.
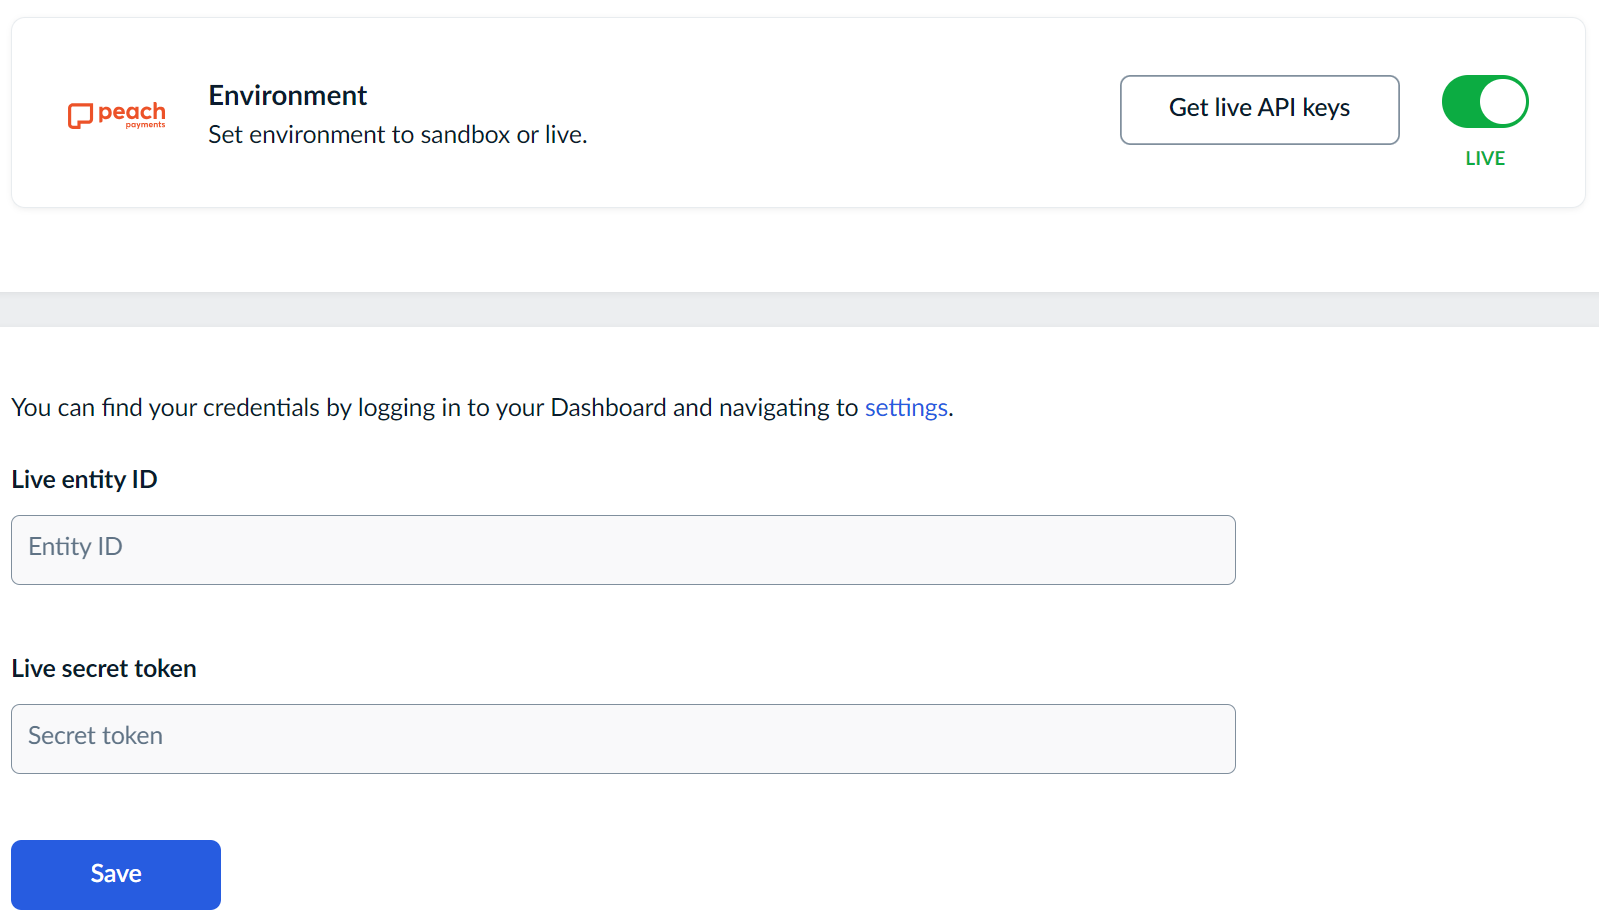
Select your environment and enter your credentials.
-
Click Save.
-
To configure a webhook, follow the instructions in the webhook documentation.
Your Peach Payments account and Ecwid store are now linked, and you can accept payments through Peach Payments.
Disable the Peach Payments payment method
To disable the Peach Payments payment method temporarily:
- In the left navigation menu of the Ecwid control panel, go to Payment.
- In the Current payment methods section, click the Peach Payments toggle so that it turns grey.
Ecwid disables the Peach Payments payment method and you cannot accept payments using it.
Remove the Peach Payments payment method
To remove the Peach Payments payment method entirely:
- In the left navigation menu of the Ecwid control panel, go to Payment.
- In the Current payment methods section, click Actions > Remove.
Ecwid removes the Peach Payments payment method from your store. To add it back, perform the configuration process again.
FAQ
Why doesn't my Ecwid store redirect to checkout when my customers try to pay
Show answer
If you're hosting your website on Google Sites and you've embedded an Ecwid store or shopping cart on the website, your website cannot redirect to checkout. Instead of embedding the Ecwid store or shopping cart, you should use Ecwid's Instant Site, which allows you to redirect to checkout when your customers try to pay.
Updated 2 months ago