Payment Page
Introduction
The Payment Page product enables you to create a secure payment page hosted by Peach Payments. Customers can use the page to pay you an amount ≥ 10.00 and ≤ 10000.00 (contact support to decrease the limit or to increase it to a maximum of 999999.99) with a custom reference.
Payment Page supports your default currency and cannot accept multiple currencies. Contact support to update your default currency.
Payment Page uses Checkout to accept payments and supports all the payment methods that Embedded Checkout offers.
Using the Peach Payments Dashboard, you can:
- Create a payment page and share it using Facebook, X (formerly Twitter), or WhatsApp.
- Add terms of service to the payment page and make it mandatory for customers to accept them before making payment.
- Add multiple email addresses that Payment Page notifies when customers complete a payment.
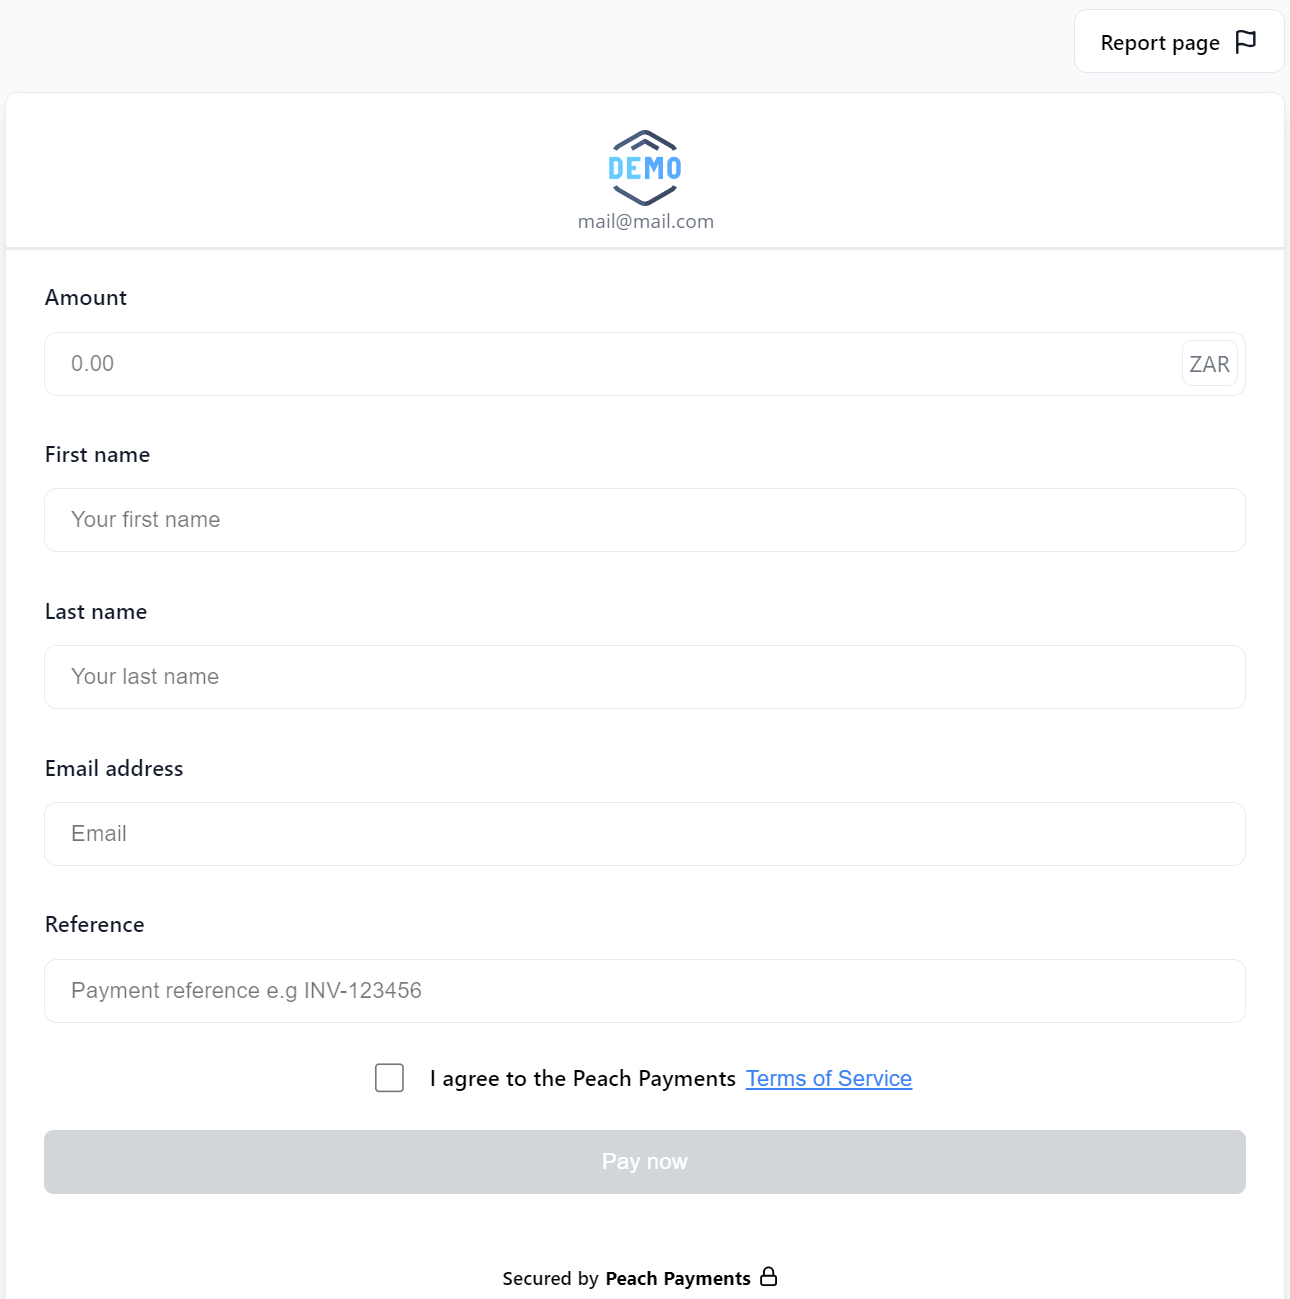
Example payment page with required terms of service.
Example use case
Instead of sending bank details to your customer, you can send the payment page link which allows your customer to pay using a variety of payment methods.
Known limitations
If FNB is your acquirer, your customers cannot use special characters in the reference and must only use letters and numbers.
Activate Payment Page
Only certain roles can activate Payment Page.
To configure and use Payment Page, you must first activate the service:
-
Log in to the Peach Payments Dashboard.
-
In the left navigation menu, click Payment Page.
-
Click Activate Payment Page.

Activate Payment Page button.
This activates the Payment Page service and enables you to configure, publish, and share the payment page.
Publish payment page
Only certain roles can publish Payment Page.
To publish your payment page, it must be active.
Publish your payment page as follows:
- Log in to the Peach Payments Dashboard.
- In the left navigation menu, click Payment Page.
- Click the Payment page status toggle to the on position.
The status of Payment Page changes to Published.

Payment page status.
Share payment page
Share the payment page with your customers to enable them to pay you. You can share from the Peach Payments Dashboard directly to Facebook, X (formally Twitter), or WhatsApp. Or you can share the link using email, instant messaging, or any other medium. You also have access to a QR code that you can display to direct your customers to your payment page.
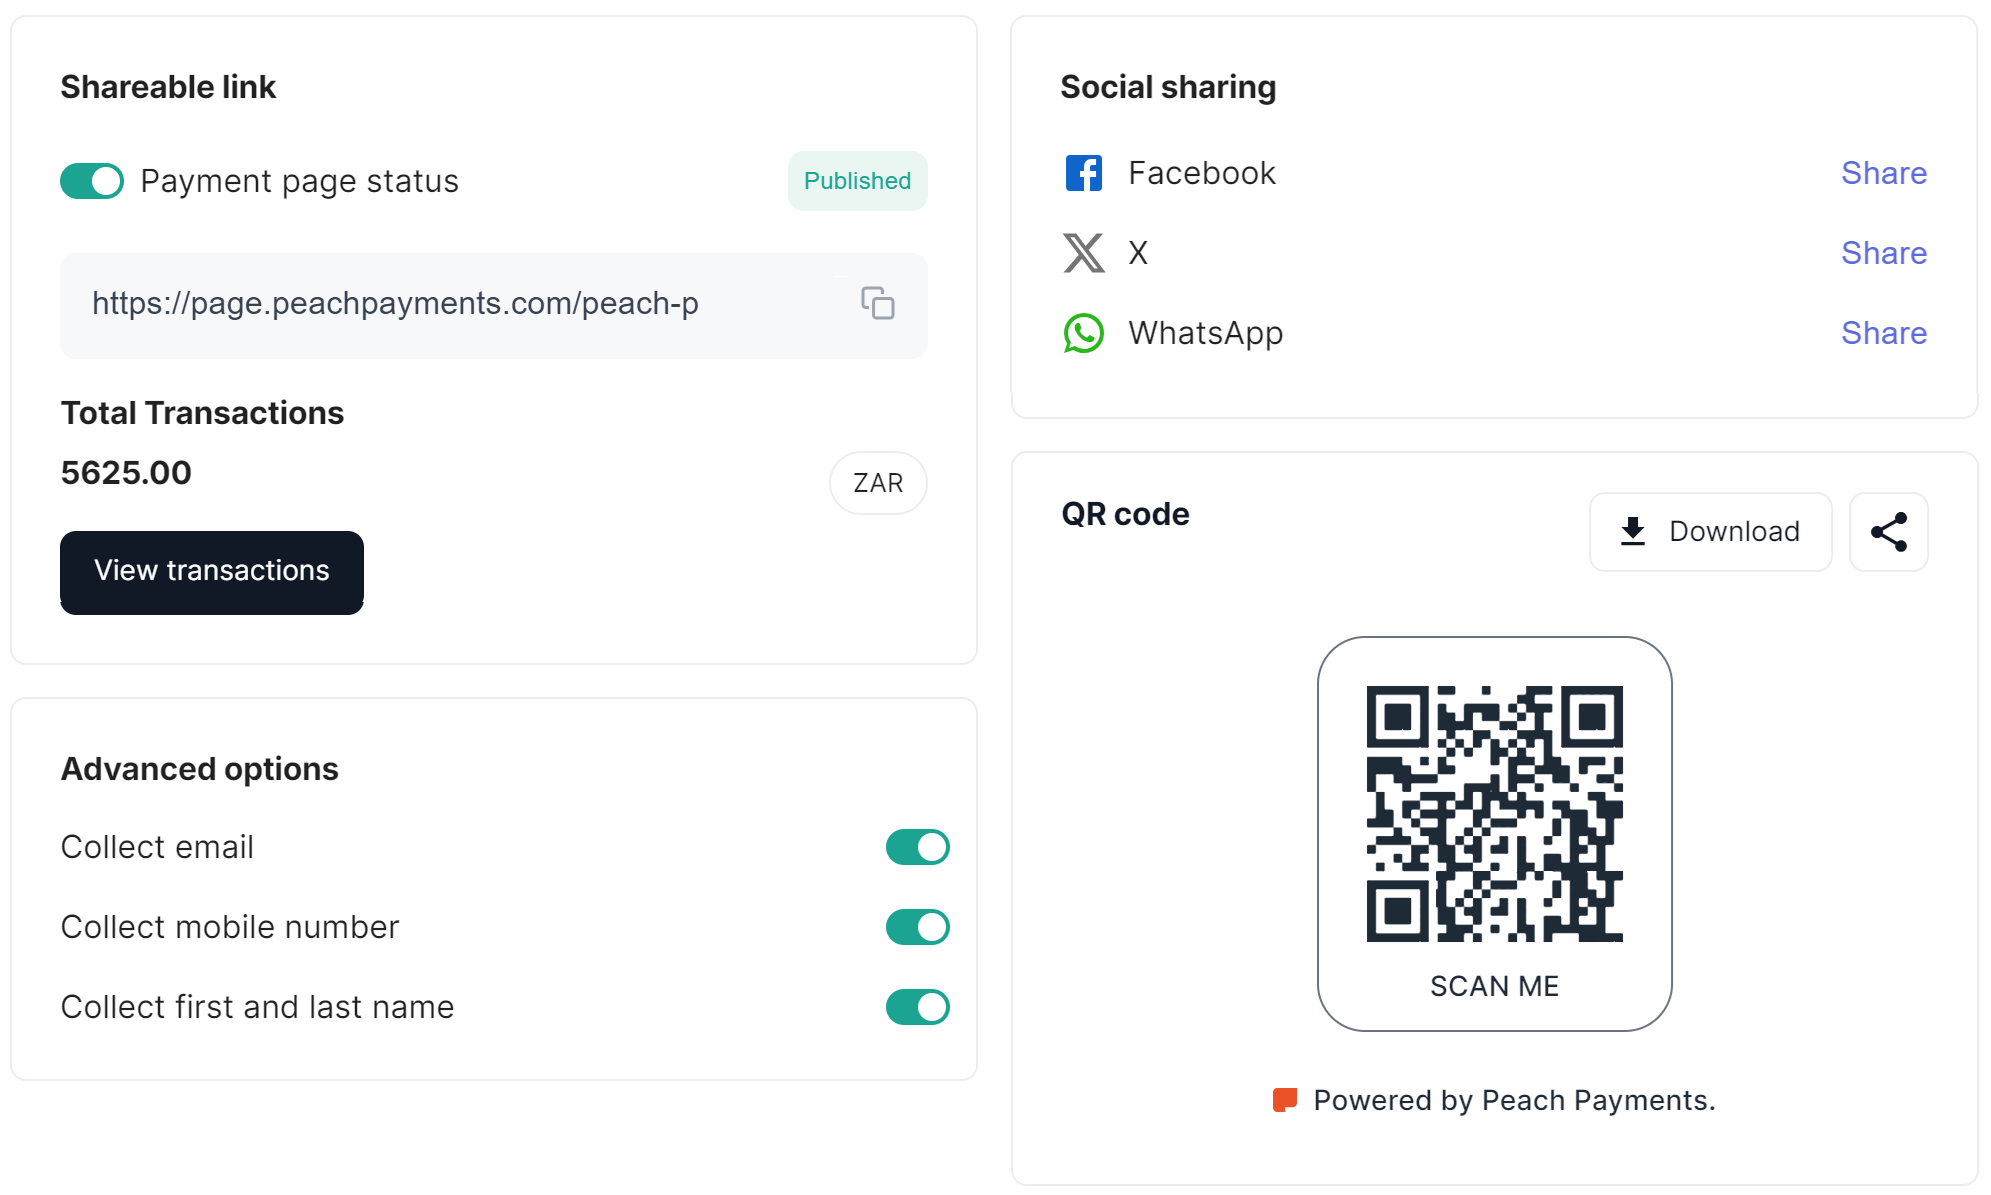
Payment Page sharing options.
Share with prepopulated values
Share your payment page with prepopulated values (amount, first name, last name, email address, mobile number, and reference) as follows:
- Log in to the Peach Payments Dashboard.
- In the left navigation menu, click Payment Page.
- Copy the shareable link and append the amount, first name, last name, email address, mobile number, reference, or any combination of these parameters to the link as query string parameters as shown in the following example (remember to replace
peach-pwith your own Payment Page identifier):https://page.peachpayments.com/peach-p?amount=10.00&reference=INV12345678&[email protected]&firstName=Grace&lastName=Nkosi&mobile=0123456789.- The parameters provided must be valid, for example, you cannot specify an email address that does not contain an
@symbol. - If you're prepopulating the email address, first name, and last name ensure that the Collect email, Collect mobile number, and Collect first and last name toggles are on.
- The parameters provided must be valid, for example, you cannot specify an email address that does not contain an
- Share the modified link with your customer.
When your customer clicks the link, the payment page loads with the amount, first name, last name, email address, mobile number, and reference populated, enabling them to pay without having to enter this information themselves. They can change the information if necessary.
View transactions
View transactions attempted and completed by customers using your payment page as follows:
- Log in to the Peach Payments Dashboard.
- In the left navigation menu, click Payment Page.
- In the Shareable link section, click View transactions.
You're taken to the Transactions section of the Dashboard with the filter set to Payment Page and the date set to Today. To view more transactions, expand the date range.
Configure settings
Only certain roles can manage Payment Page settings.
Collect customer information
Only certain roles can change Payment Page advanced options.
Configure Payment Page to collect specific customer information as follows:
- Log in to the Peach Payments Dashboard.
- In the left navigation menu, click Payment Page.
- In the Advanced options section, decide what information you need customers to provide, then toggle those options to the on position. You have to collect either email address or mobile number.
When customers visit your payment page, they must provide the information that you selected before the Pay now button becomes active.
Configure email notifications
Configure Payment Page to send you email notifications for each successful payment as follows:
- Log in to the Peach Payments Dashboard.
- In the left navigation menu, click Payment Page.
- Select the Settings tab and ensure the Receive payment notification emails toggle is in the on position.
- Type the email addresses that should receive payment notification emails, pressing enter after each email address.
- Click Save.
When customers pay you, the email addresses that you listed receive an email notification.
Add terms of service
You can make it mandatory that your customers have to agree to your terms of service before being able to pay.
Add and configure your terms of service for Payment Page as follows:
- Log in to the Peach Payments Dashboard.
- In the left navigation menu, click Payment Page.
- Select the Settings tab and paste your terms of service in the Terms of service field, adhering to the 30 000 character count restriction.
- To make it mandatory that your customers have to agree to your terms of service before making payment, select the Require your customers to consent to your terms of service check box and click Save. Not selecting the check box displays the terms of service link to your customers but does not require that they accept them.
A link to your terms of service appears on the payment page. If you made it mandatory, your customers need to accept your terms of service before they can pay.
Configure default payment method
Configure your payment page to load a default payment method when customers click Pay now as follows:
- Log in to the Peach Payments Dashboard.
- In the left navigation menu, click Payment Page.
- Select the Settings tab and scroll down to the Default payment method section.
- Choose the default payment method from the list and click Update details.
When your customers click Pay now on your payment page, the default payment method loads. Customers can choose to go back if they want to pay using a different payment method.
Edit visible email address
The email address that appears beneath your company logo on the payment page is the business contact for your company. To change the email address to a different email address while keeping your business contact the same, contact support.
Updated about 2 months ago